StatusVFX Asset Pack
Unreal Engine Niagara Asset Pack
Available now on the Fab Marketplace!
Documentation
Setup
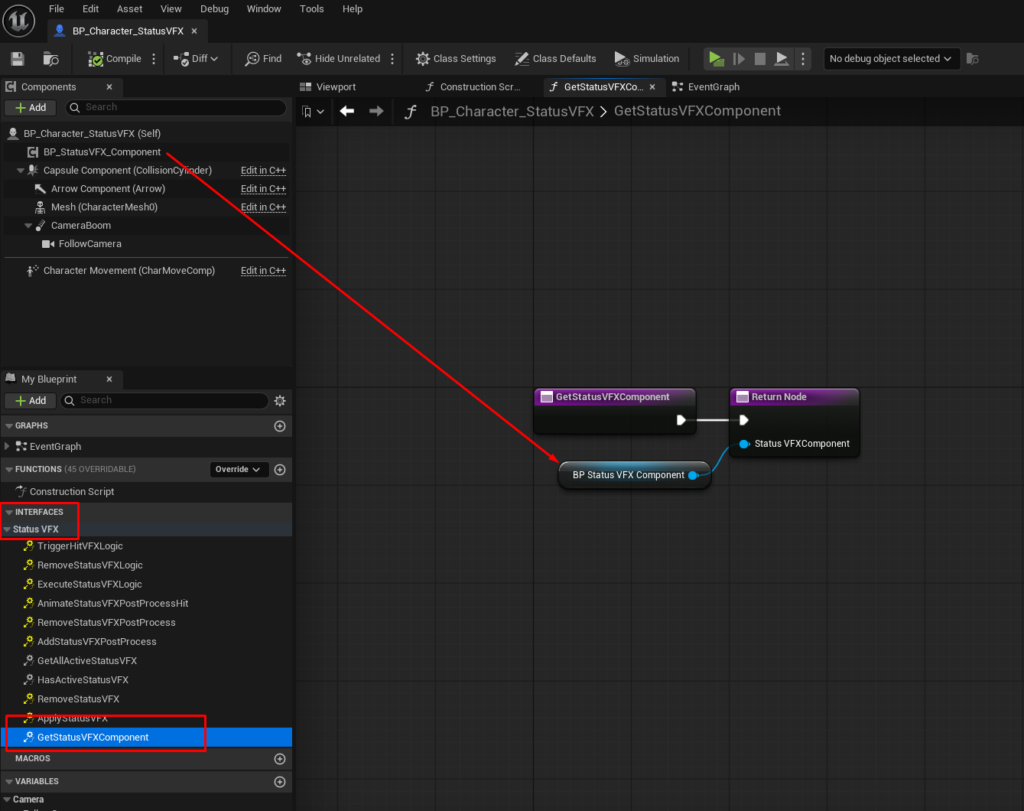
1. Open up your character blueprint and add a Status VFX Component.

2. Go into the Class Settings and add the Status VFX Interface.
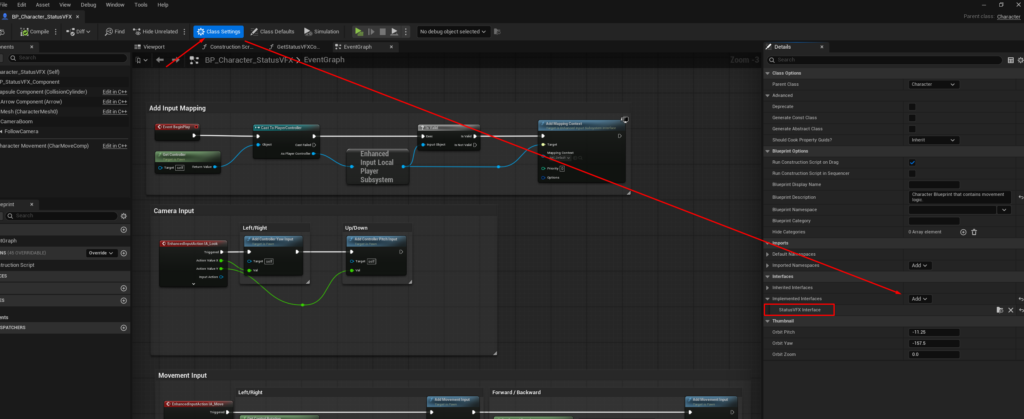
3. Go into the Interface functions and find the GetStatusVFXComponent function. Drag your newly created Status VFX Component into the return value.
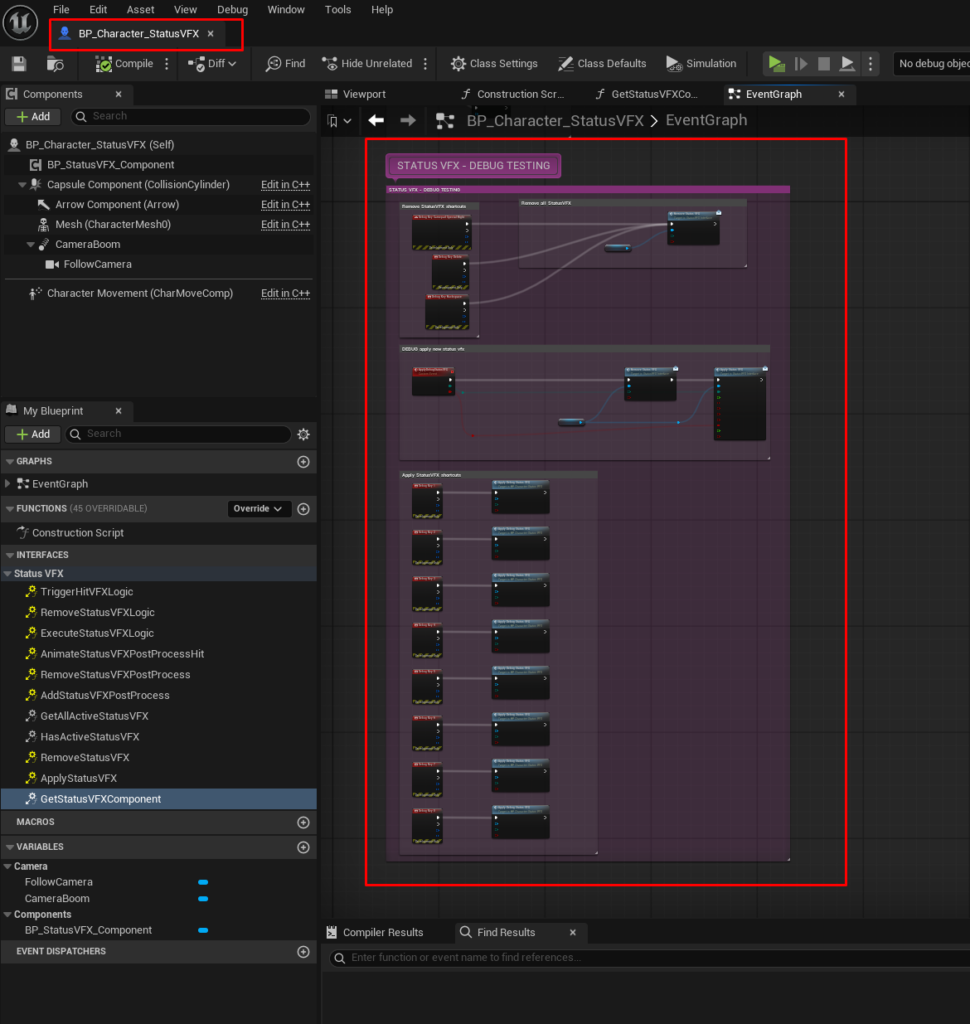
The setup is done at this point. There are two more things we can do to improve our testing experience:
Open up the demo character and copy+paste the example functions into your own character. These allow you to apply the StatusVFX via keyboard shortcuts (1-7):
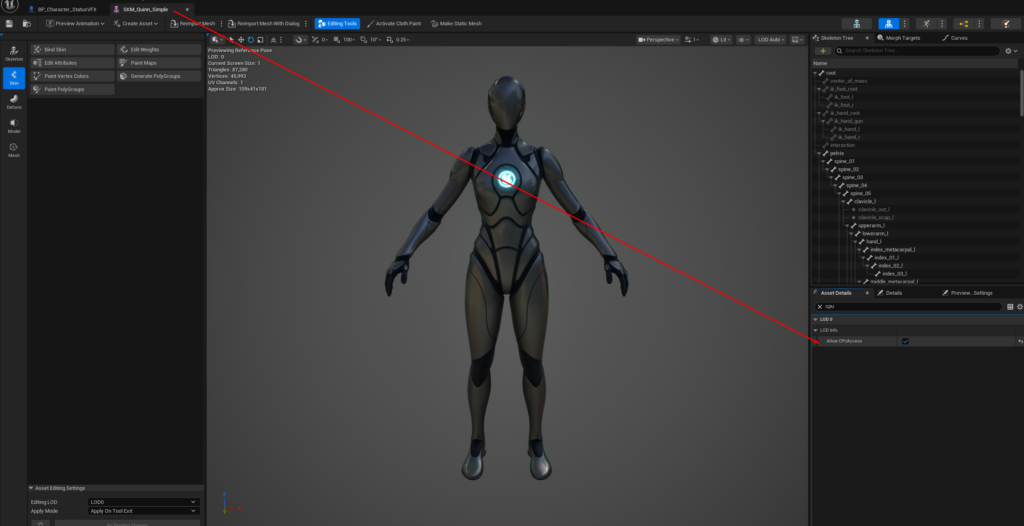
Niagara Skeletal Mesh Sampling
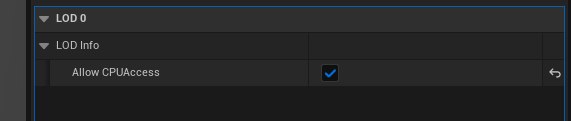
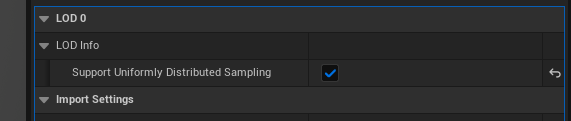
To improve the skeletal mesh sampling used in the Niagara effects, we want to allow Niagara to sample the Skeletal Mesh uniformly. We need to enable this inside the Skeletal Mesh itself:
Tick both the ‘Allow CPU Access’ and ‘Support Uniformly Distributed Sampling’ tickboxes.
Modular Characters
The default StatusVFX blueprint example only works with one Skeletal Mesh per character. If your character contains multiple Skeletal Meshes (modular setup), the Niagara Systems need to be adjusted. There are multiple ways of doing this, the easiest is to sample each Skeletal Mesh individually. To do so, we assign each Mesh a unique component tag, for example ‘Body’ & ‘Head’.
Inside Niagara we then duplicate the Sample Skeletal Mesh module and the Skeletal Mesh user parameter. One user parameter will sample the Body and the other one will sample the Head. To do so, we use the tag we find the components by tag, which we had previously setup on the character blueprint.
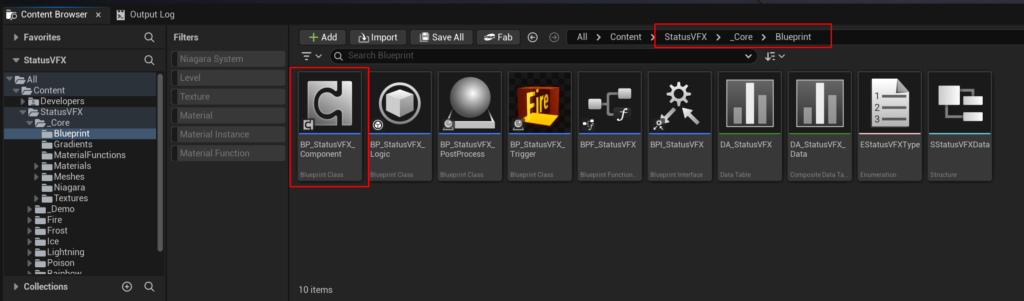
Blueprint Examples
All logic for easy setup resides in the BP_StatusVFX_Component: