Gradient Mapping for VFX – Unreal Engine 4
1. What is Gradient Mapping?
Just in case you are unsure about what gradient mapping actually means, here is a quick explanation about the basic concept behind it:
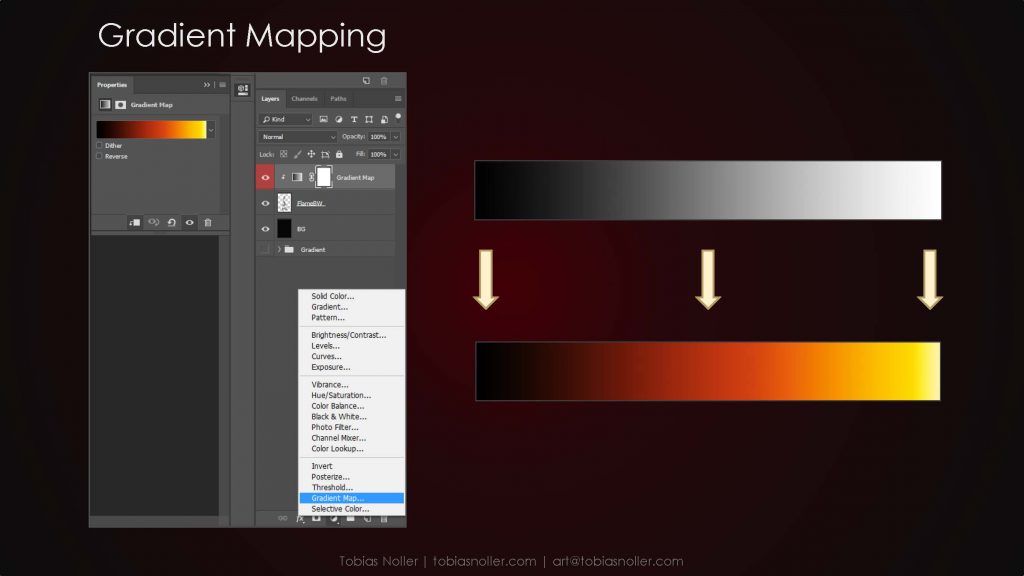
Given a black & white input image and a colored gradient, all black and white values are mapped into the equivalent color values of the given gradient.
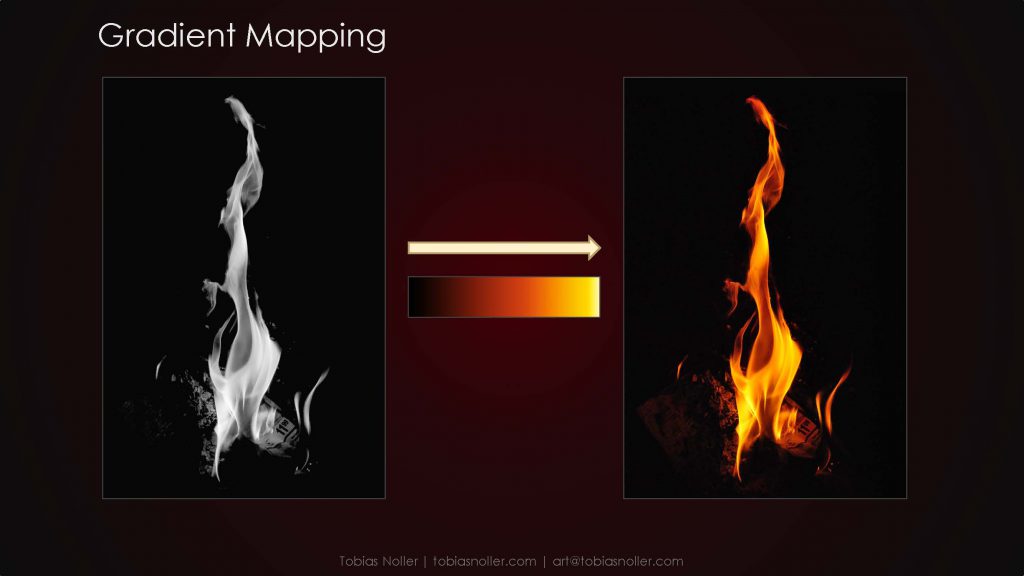
So it applies a gradient of color to your image depending on the tones in the image. Where the image is darker, the colors at the left of the gradient are applied and where the image is lighter the colors at the right of the gradient are applied. Let’s take a look as to what this actually means in this example, using the Gradient Map adjustment layer in photoshop. When we apply our colored gradient to a black & white image of a flame we get the result shown below.
Well, looks like a normal flame you say. Why not just take a colored image of a normal flame then?
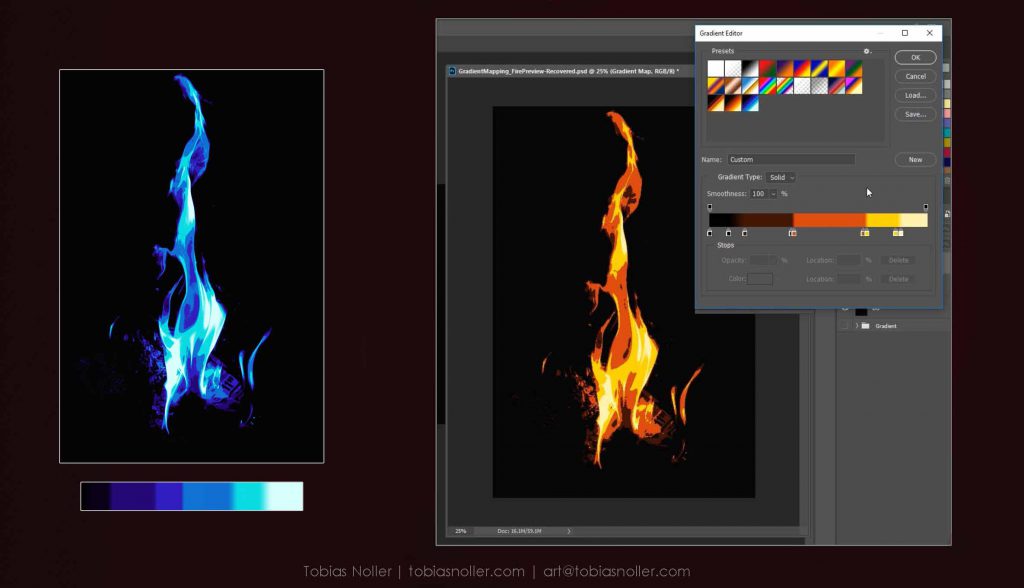
I will go into more detail about the benefits of using gradient maps later, here is one of it’s use-cases already – We can easily change the gradient with a few clicks to changes the flame’s colors, or to make it look more stylised.
2. Gradient Mapping for games
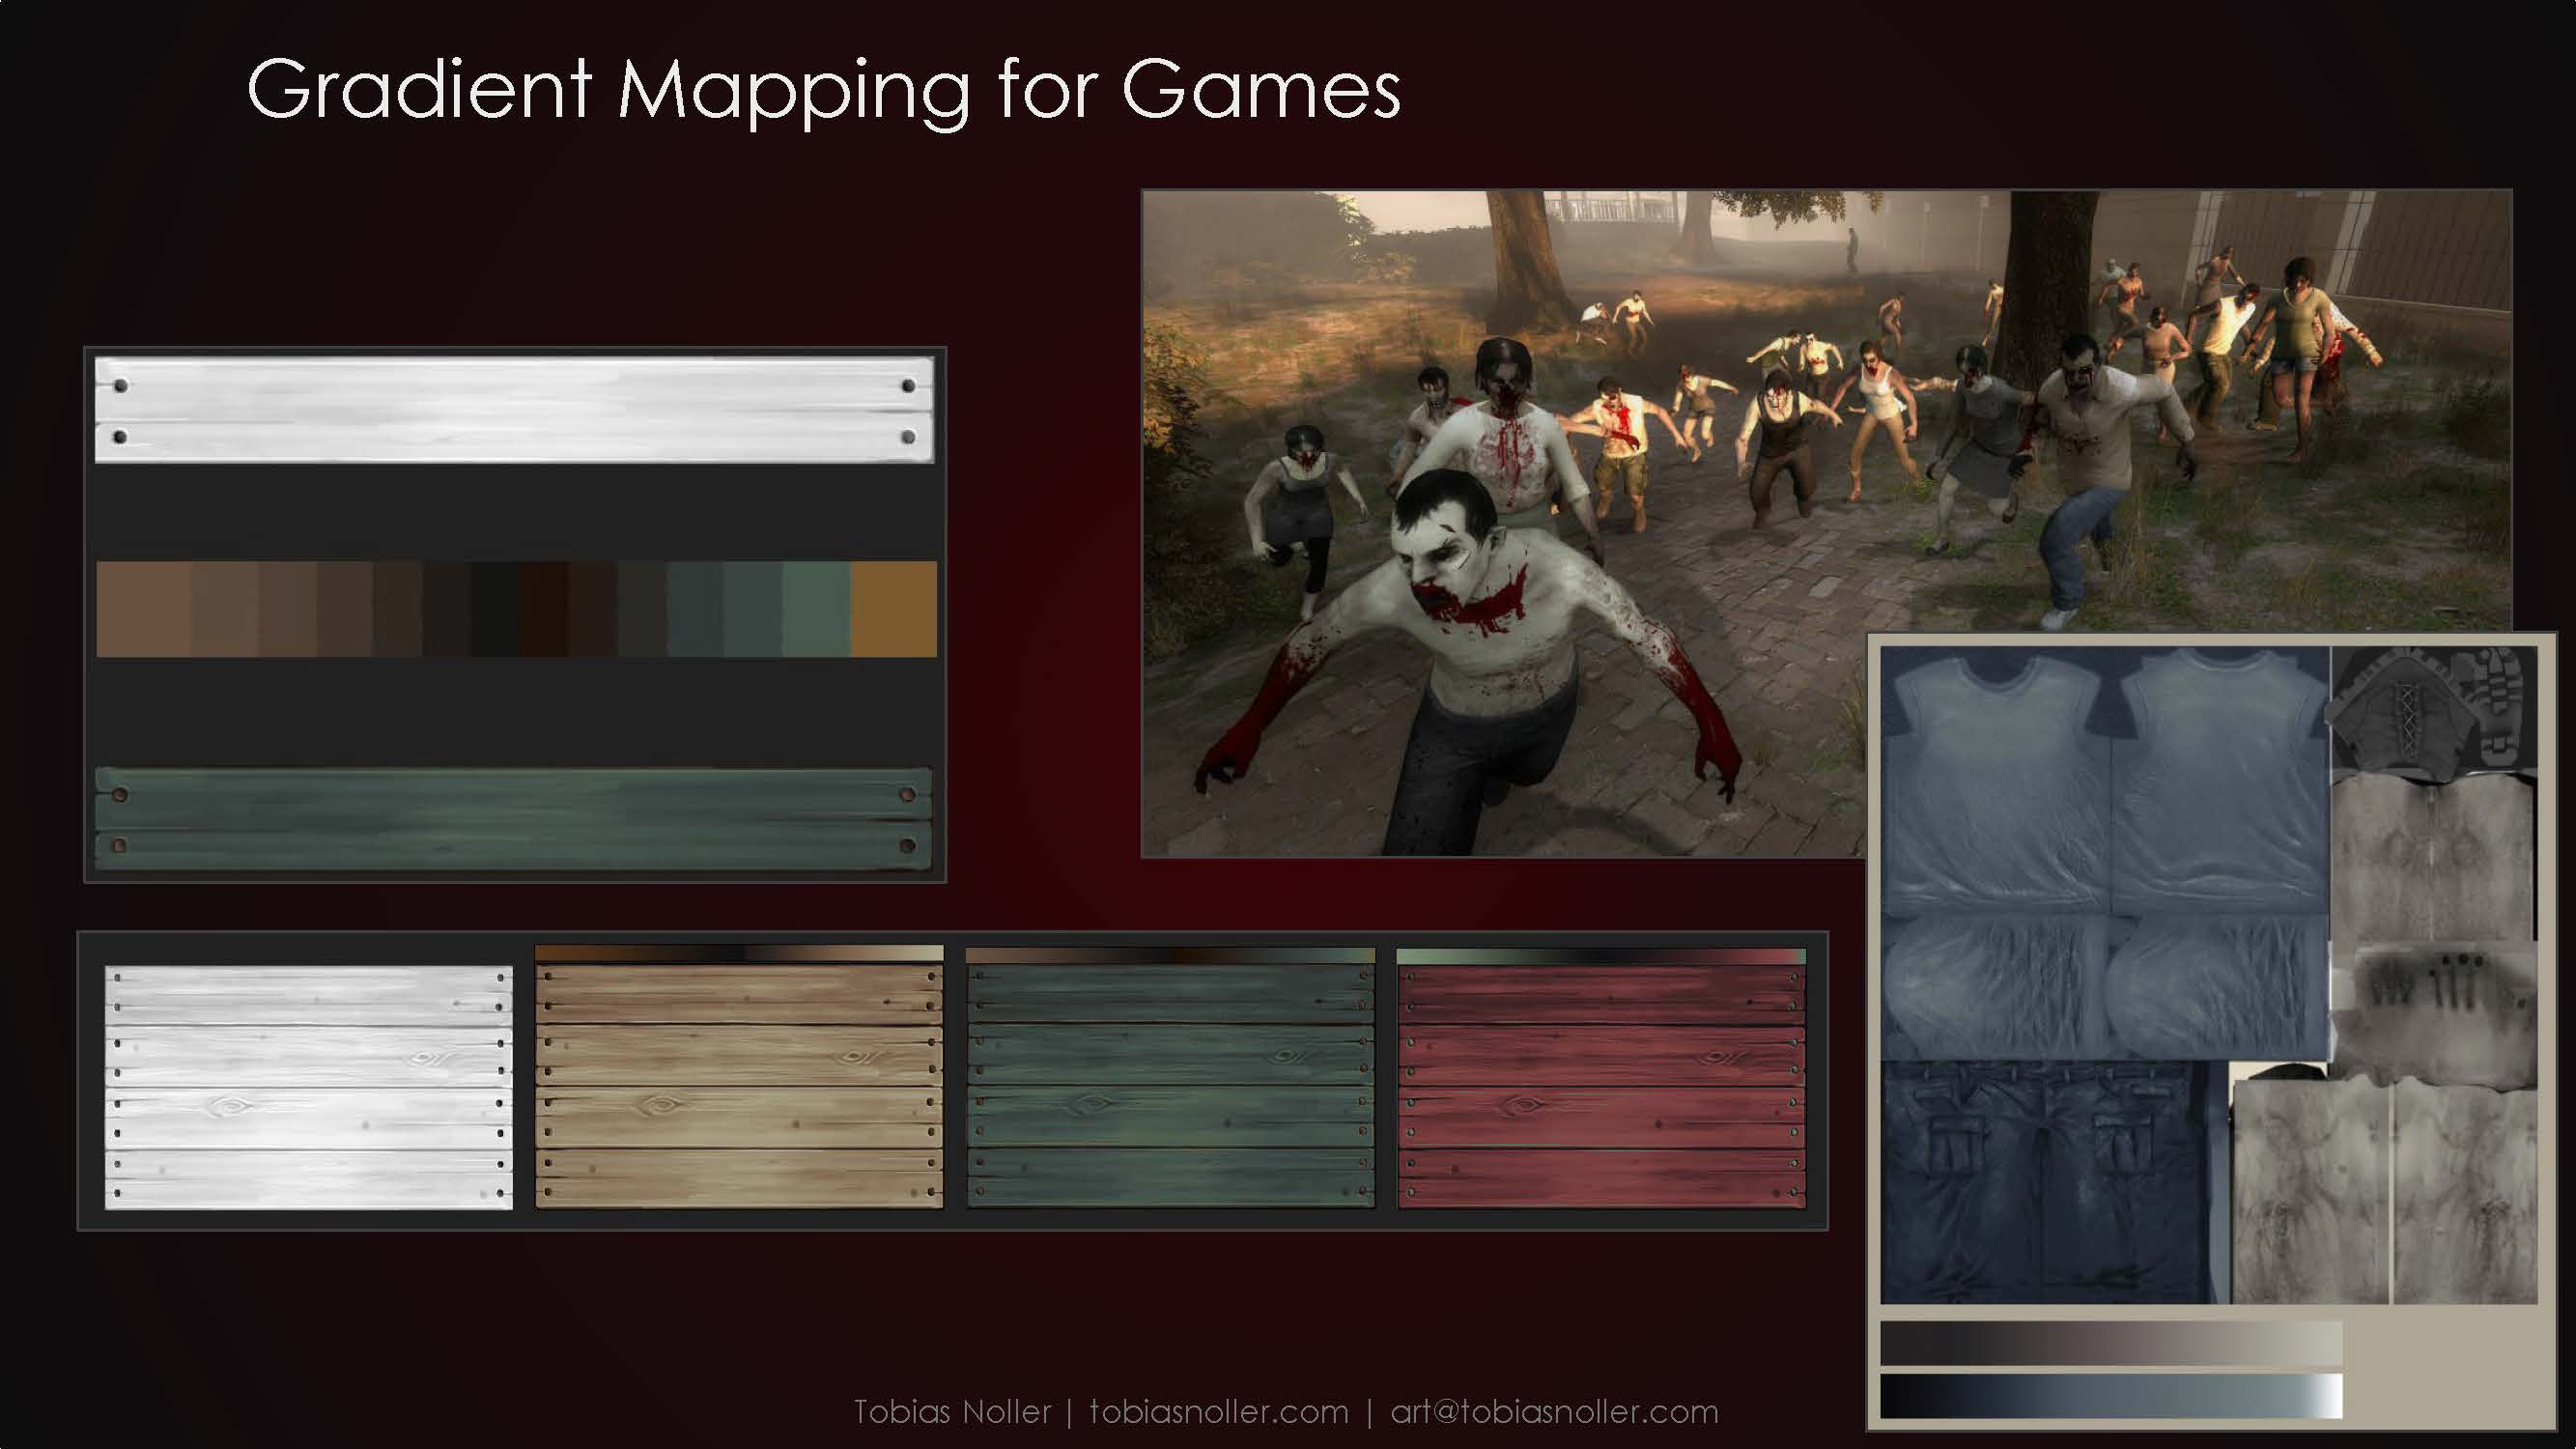
Ok, now that we know what gradient mapping is and the basics behind it, let’s jump into the game side of things. The use of gradient maps in games is nothing new, it has been donefor several games in the past, for example Left 4 Dead, Halo 3, Fallout 4, League of Legends, just to name a few.
In case you are interested in this, here are a few useful links on the topic:
- Cheap texture variations for environments
- Left 4 Dead 2 used it extensively to get thousands of different variations of zombies
- Fallout 4 to color their explosions
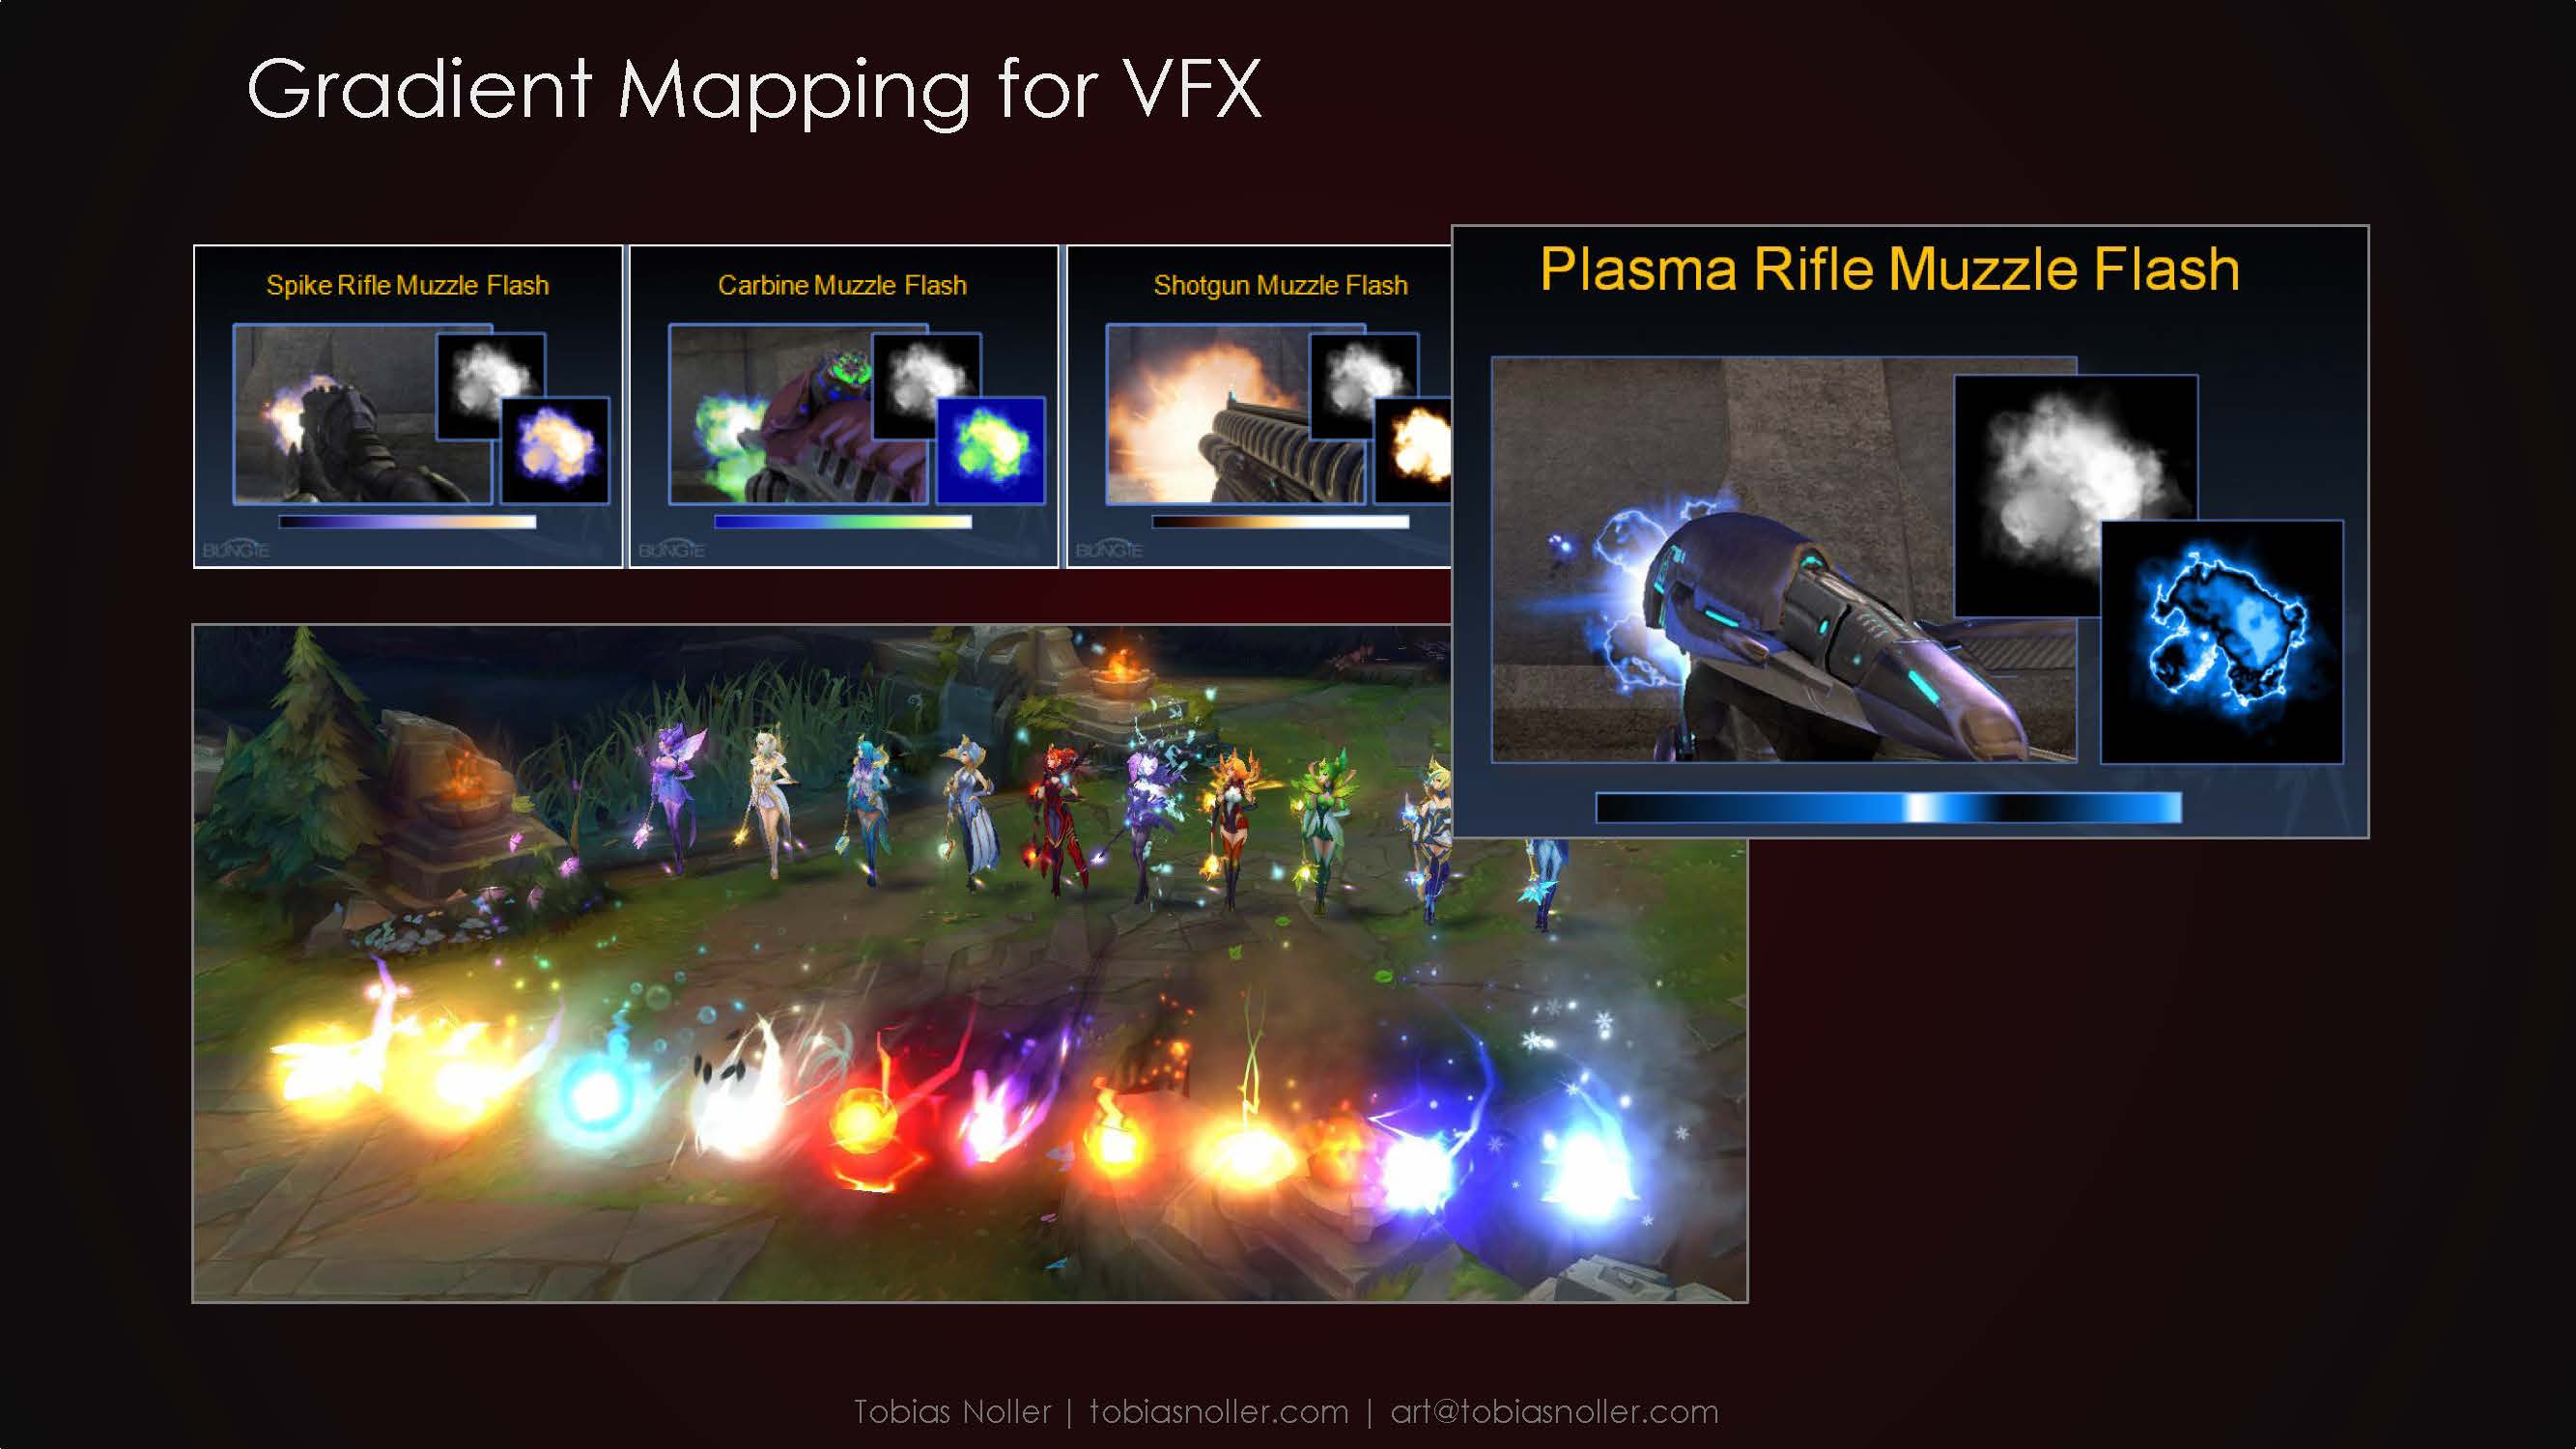
- Bungie for their muzzle flashes in Halo 3 (‘Blowing S#!t Up the Bungie Way’)
We have also been discussing this topic, especially concerning realtime visual effects, on the RTVFX forums.
In the case of Fallout 4, the use of gradient maps is especially interesting, as they are stepping through multiple gradiens throught the lifetime of an explosion particle. Simon has a written a great post about this on his website (see Fallout 4 link above).
3. Advantages of Gradient Mapping
Before we start jumping into Unreal, there’s a few key points I want to discuss here, as to why gradient maps are such a useful technique. These advantages would be:
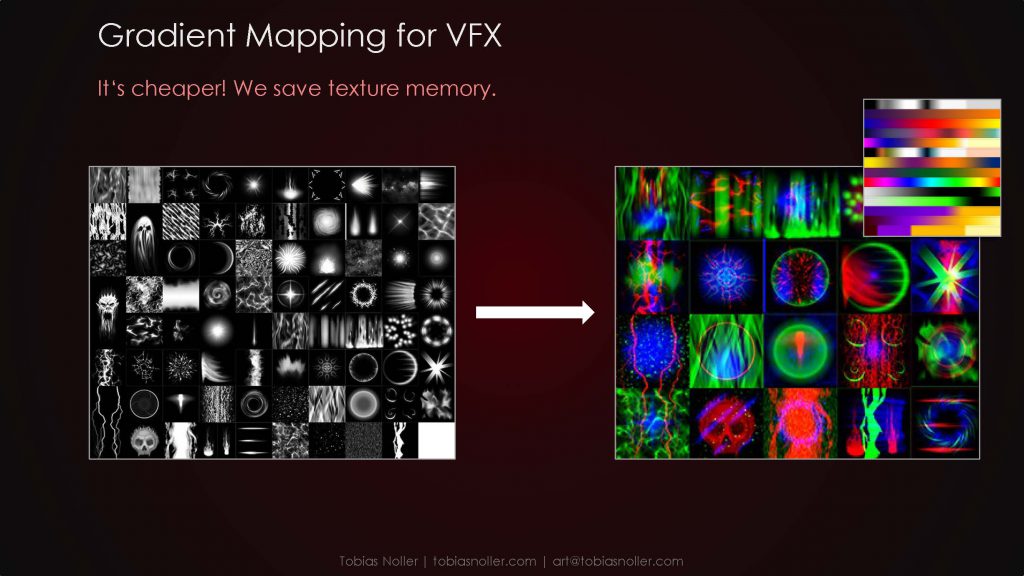
- It’s cheaper and saves texture memory
- It’s flexible and allows for fast iterations and color changes
- It’s procedural, so shader manipulations can affect your colors
- It’s an easy way to give your art some form of color stylisation
It’s cheaper!
As our input image is only black & white, we can channel pack three of those b/w input images into one texture, to save texture memory. If we would use a colored image, we already make use of all the color channels, so in theory we save 2/3 in texture memory cost.
We will have to pay the cost for the gradient texture though, which might add another texture read, depending on the gradient mapping technique being used. However, the gradient texture will have a size of 256×1 px, which is relatively small.

Considering the sheer amount of shape-, alpha- and noise-textures we have when adding a lot of VFX to our project, it’s definitely worth saving texture memory as much as possible there. As most of those vfx-specific textures will be greyscale anyway, it’s basically a free save, to channel pack those textures. (Don’t forget to set your textures to ‘Masked’ compression. )
There’s also a small drawback to this: It might be confusing at times when looking for a specific image, as you don’t have the same kind of overview over your textures. It happened multiple times to me already, that I was searching for a specific texture within the project, just to discover it had been hiding in a random texture’s blue-channel.
It’s flexible!
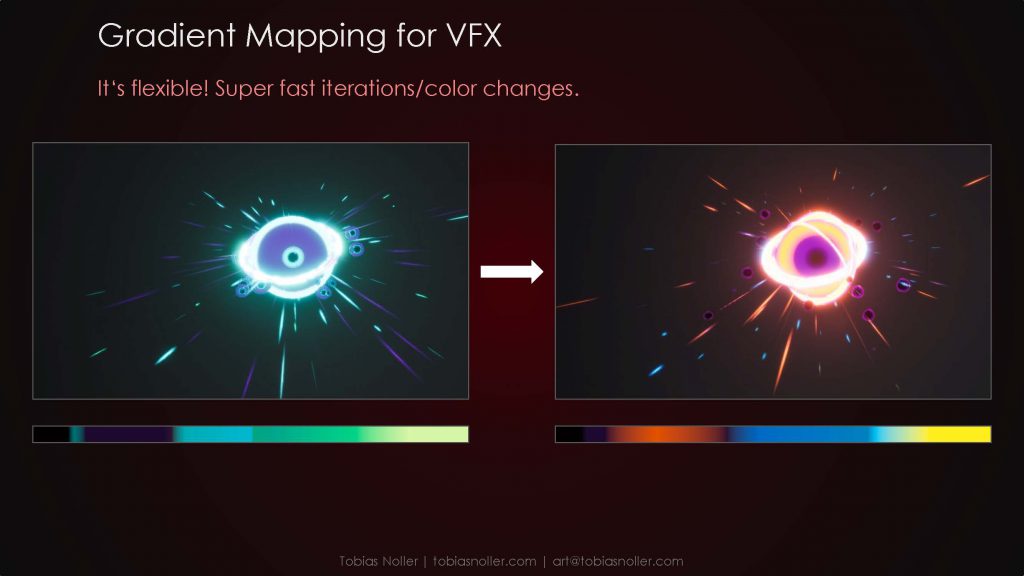
When set up correctly, making color changes to your effects can be a very fast process. Just change the gardient and all the effects using the gradient will change instantly. Especially with Unreal’s new curve system for materials, it’s super easy to do, as gradients can be adjusted at runtime!
The video below shows me adjusting curves at runtime, and how complex color changes can be made in seconds, for an entire effect with multiple Emitters. Keep in mind that the materials for this example have been setup in a specfic way, all using the same gradient.
This is not only useful for quick iterations, but can also come in handy when creating different color variations for the same effect. Just pipe a different gradient into all of the materials via code/blueprint for each variation, et voilà!
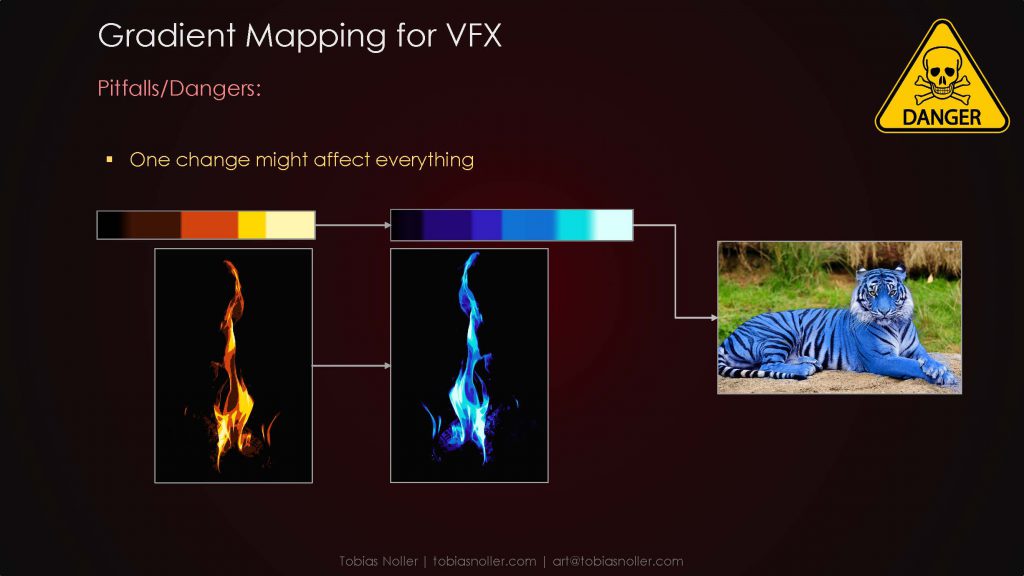
As with every advantage there comes a slight drawback:
If you are working on a massive project with loads of gradients, the entire team has to be very careful not to accidentally re-use or change the wrong gradients. For example, if character artists start using vfx-gradients, and vfx artists decide to change the looks of their effects, unwanted color changes might occur for the characters. Just treat this method with care and you should be fine.
It’s procedural!
As I’m a fan of shader/material manipulations, this is the big one for me.
For most of the effects I create, I try to make them as procedural as possible, as players are usually doing the same actions over and over again. And as we don’t want the effect to get boring and look exactly the same every time, we try to make it as random as possible. Just as an example, we can do this by panning a simple noise texture over our default shape texture. The great thing about the gradient mapping is, it works in real-time, after all the texture manipulations.
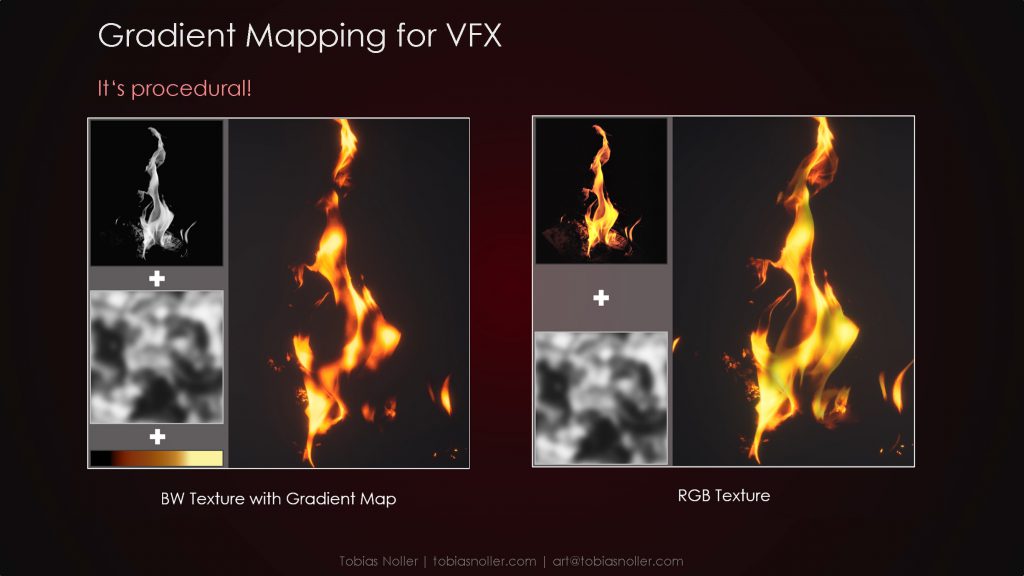
This example shows a comparison between a normal RGB- and a gradient-mapped b/w texture, both multiplied with a b/w noise texture. As you can see, when we erode the flame, the gradient-map picks up the darkening of those values and hence procedurally changes the colors in those areas.
This is useful for all kinds of material/shader manipulations. As a second example, i’ve added a gradient from top to bottom and a flowmap to our flame texture. Both are applied before the gradient-map, which means they both affect the final color of our flame, making it look much righer in colors. Compared to the example on the right, which just looks a bit bland and shallow, it’s quite clearly visible how much more color fidelity we get using gradient maps.
The only limitation you might stumble upon is the max. number of colors (256), as your greyscale image is limited in colors. We rarely need more than 256 colors in one image, only when using a lot of gradial values within one texture. Then you will have visual banding artifacts.
Easy Stylisation!
As mentioned in our photoshop example right at the start, it’s sooo easy to get stylised colors using this technique. To spice things up a bit I’ve changed out noise texture to something more stylised and shifted the gradient-map colors closer together. Our final flame looks like this then:
4. Gradient Mapping inside Unreal
Finally! The part we’ve all been waiting for.
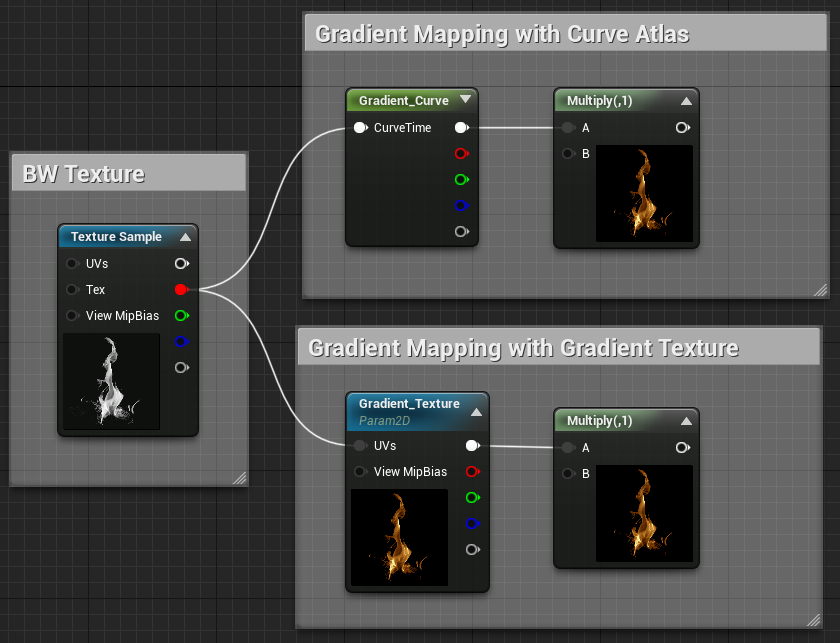
The old method of setting up gradient maps inside a material would require you to drag in your b/w texture and a grandient texture, then just plug your texture into the gradient’s UVs (bottom example).
However, since unreal 4.20 we can use the new method, ‘Curve Atlases’, using a Color Curve (top example). This is far superior, as you can adjust gradients within the engine and don’t have to go back and forth between Photoshop and Unreal. The documentation on this is quite thorough, and it’s explained here:
https://docs.unrealengine.com/en-US/Engine/Rendering/Materials/CurveAtlasesInMaterials/index.html
The old method is still viable though, for example when changing gradients over time, as you need a smooth gradient in the V-axis as well, not only in U.
Remember the example of Fallout 4? That’s what I’m talking about.
I’ve also included another example, just to showcase how changing the gradient over the lifetime of an effect can yield quite interesting results.
this article is work in progress and not finished yet